ECにおいて購入意思のある顧客と接触できるのが、チェックアウト画面です。チェックアウト拡張であれば、ストア独自のカスタマイズを施し、確度の高いコミュニケーションを実現します。今回はそのUI部分を担うCheckout UI extensionsの実装について、解説していきたいと思います。
※Checkout UI extensionsはShopify Plusストア限定です
Checkout UI extensionsを使用することで、Shopifyのチェックアウト画面に任意の機能を追加することができます。
例えば、注文商品に応じた注意事項の表示や、別の商品を提案し追加注文を促す、といったさまざまな用途で設定が可能です。
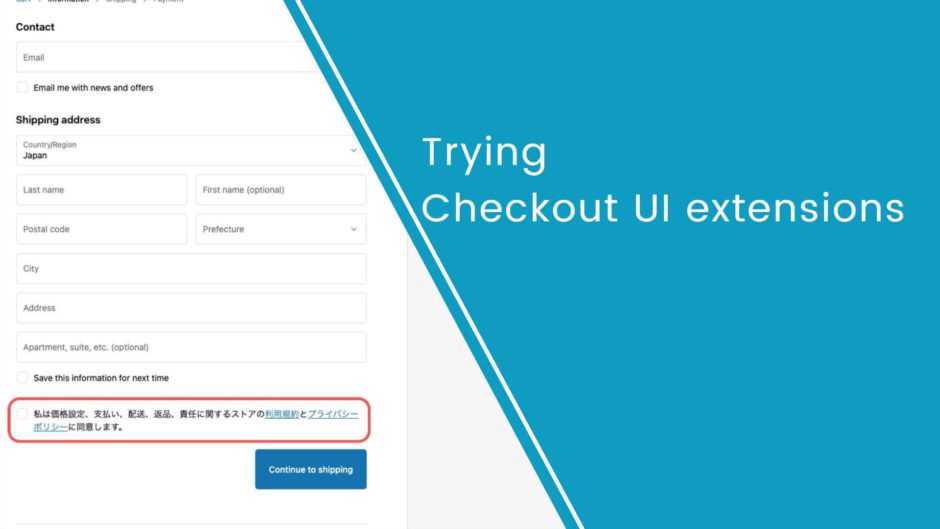
今回のこの記事では、注意事項の表示を例に紹介します。具体的には、利用規約やプライバシーポリシーに同意してもらうためのチェックボックスを設置し、チェックがない場合は注文を進めることができない実装を行っていきます。
1.環境設定
npm init @shopify/app@latest💡 アプリを作成するとき、Get started building your app:の項目で、Start by adding your first extensionを選択することで拡張機能のみのアプリを作成することができます。今回はStart by adding your first extensionを選択します。
まずは拡張機能のアプリを追加します。
作成する拡張機能はCheckout UIを選択してください。今回の例ではTypeScript Reactで作成します。
cd your-app
npm run generate extension
💡 この時、パートナーダッシュボードにある既存のアプリに連携するか新規で作成するか聞かれます。今回は新規で作成しています。
その後、作成したアプリをパートナーダッシュボードからインストールします。

💡 Checkout and Customer Accounts Extensibilityプレビューが適用されているストアにインストールしてください。
アプリがインストールできたら、作業開始。アプリのディレクトリの中にextensionsフォルダがあり、そこに拡張機能のファイルが格納されています。
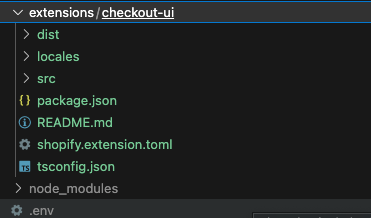
extensionsフォルダ内のshopify.extension.tomlというファイルを見てみましょう。
# Learn more about configuring your checkout UI extension:
# https://shopify.dev/api/checkout-extensions/checkout/configuration

# The version of APIs your extension will receive. Learn more:
# https://shopify.dev/docs/api/usage/versioning
api_version = "2023-07"

[[extensions]]
type = "ui_extension"
name = "checkout-ui"
handle = "checkout-ui"

# Controls where in Shopify your extension will be injected,
# and the file that contains your extension’s source code. Learn more:
# https://shopify.dev/docs/api/checkout-ui-extensions/unstable/extension-targets-overview

[[extensions.targeting]]
module = "./src/Checkout.tsx"
target = "purchase.checkout.block.render"

[extensions.capabilities]
# Gives your extension access to directly query Shopify’s storefront API.
# https://shopify.dev/docs/api/checkout-ui-extensions/unstable/configuration#api-access
api_access = true

# Gives your extension access to make external network calls, using the
# JavaScript `fetch()` API. Learn more:
# https://shopify.dev/docs/api/checkout-ui-extensions/unstable/configuration#network-access
# network_access = true

# Loads metafields on checkout resources, including the cart,
# products, customers, and more. Learn more:
# https://shopify.dev/docs/api/checkout-ui-extensions/unstable/configuration#metafields

# [[extensions.metafields]]
# namespace = "my_namespace"
# key = "my_key"
# [[extensions.metafields]]
# namespace = "my_namespace"
# key = "my_other_key"

# Defines settings that will be collected from merchants installing
# your extension. Learn more:
# https://shopify.dev/docs/api/checkout-ui-extensions/unstable/configuration#settings-definition

# [extensions.settings]
# [[extensions.settings.fields]]
# key = "banner_title"
# type = "single_line_text_field"
# name = "Banner title"
# description = "Enter a title for the banner"
このファイルには拡張機能の名前、表示先、メタフィールド、機能の設定が含まれています。
今回は、注文時に利用規約やプライバシーポリシーに同意してもらうためのチェックボックスを実装し、チェックがない場合は注文を進めることができないようにします。
実現には、アプリ側でチェックアウトに進まない制御のためにtomlファイルへの設定が必要です。
extensions.capabilitiesの項目にblock_progress = trueを追加して、アプリがチェックアウトをブロックできるように設定します。
# Learn more about configuring your checkout UI extension:
# https://shopify.dev/api/checkout-extensions/checkout/configuration

# The version of APIs your extension will receive. Learn more:
# https://shopify.dev/docs/api/usage/versioning
api_version = "2023-07"

[[extensions]]
type = "ui_extension"
name = "checkout-ui"
handle = "checkout-ui"

# Controls where in Shopify your extension will be injected,
# and the file that contains your extension’s source code. Learn more:
# https://shopify.dev/docs/api/checkout-ui-extensions/unstable/extension-targets-overview

[[extensions.targeting]]
module = "./src/Checkout.tsx"
target = "purchase.checkout.block.render"

[extensions.capabilities]
# Gives your extension access to directly query Shopify’s storefront API.
# https://shopify.dev/docs/api/checkout-ui-extensions/unstable/configuration#api-access
api_access = true
block_progress = true ←追加

# Gives your extension access to make external network calls, using the
# JavaScript `fetch()` API. Learn more:
# https://shopify.dev/docs/api/checkout-ui-extensions/unstable/configuration#network-access
# network_access = true

# Loads metafields on checkout resources, including the cart,
# products, customers, and more. Learn more:
# https://shopify.dev/docs/api/checkout-ui-extensions/unstable/configuration#metafields

# [[extensions.metafields]]
# namespace = "my_namespace"
# key = "my_key"
# [[extensions.metafields]]
# namespace = "my_namespace"
# key = "my_other_key"

# Defines settings that will be collected from merchants installing
# your extension. Learn more:
# https://shopify.dev/docs/api/checkout-ui-extensions/unstable/configuration#settings-definition

# [extensions.settings]
# [[extensions.settings.fields]]
# key = "banner_title"
# type = "single_line_text_field"
# name = "Banner title"
# description = "Enter a title for the banner"
続いて、以下のページを参照しながら実装していきます。
UI components
Checkout UIでは、チェックアウト画面専用のコンポーネントが用意されています。
こちらのCheckboxとLinkを使っていきます。
React Hooks
チェックアウト画面で利用できるReact Hooksが用意されています。
今回は、useBuyerJourneyInterceptを使ってチェックボックスにチェックがない時にチェックアウトが進まないように実装していきます。
今回は使用しませんが、カート内の情報や顧客情報などを取得するためのAPIも用意されています。
Extension API
2. 実装
Checkout UI開発をする時は、以下のコマンドで開発環境のアプリを起動します。
npm run dev起動するとPreview URLと表示されますので、そちらを確認してみましょう。

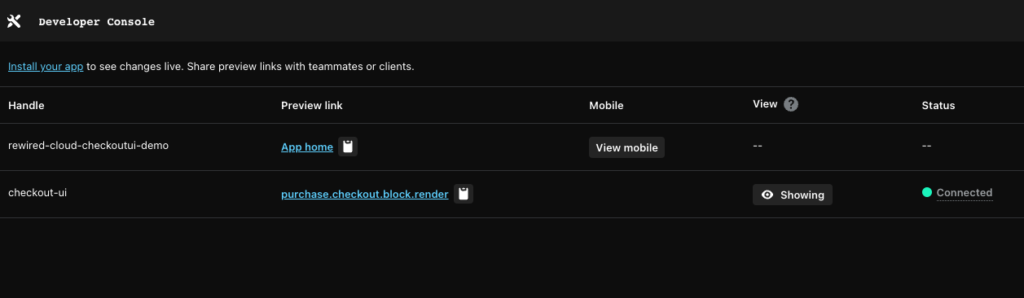
すると、先ほど作成した拡張機能checkout-uiが表示されるかと思います。 Preview linkを押すと、チェックアウト画面が表示され、プレビュー表示することができるようになります。
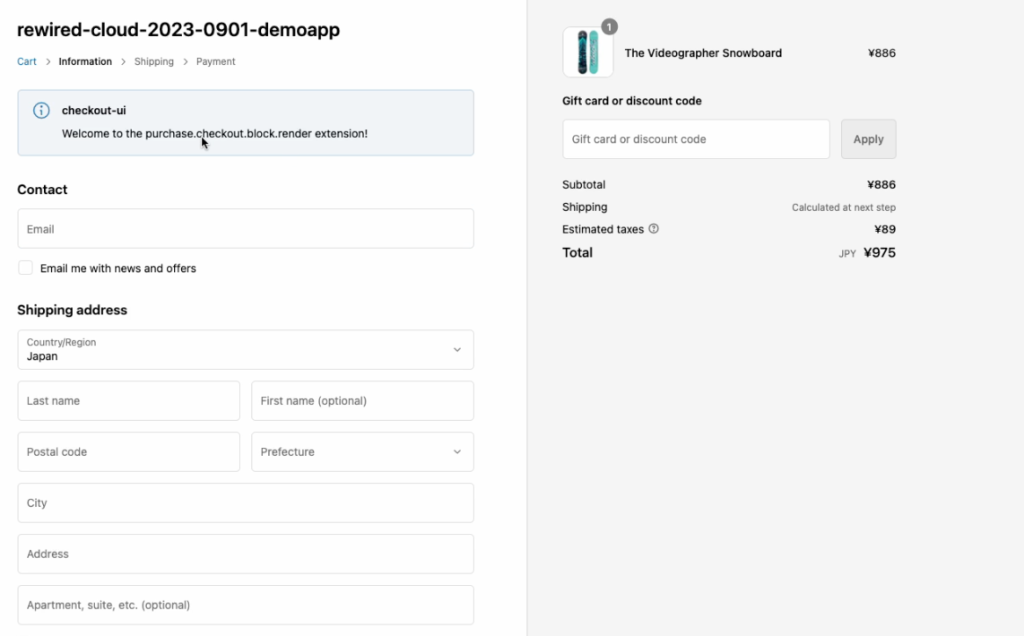
こちらの画面でプレビューしながら実装していきます。
3.実装例
import {
reactExtension,
Checkbox,
Link,
useBuyerJourneyIntercept
} from '@shopify/ui-extensions-react/checkout';
import { useState, useCallback } from 'react';
export default reactExtension(
'purchase.checkout.block.render',
() => <Extension />,
);
function Extension() {
const [isCheckbox, setCheckbox] = useState<boolean>(false)
const [isError, setError] = useState<string>('')
useBuyerJourneyIntercept(
({ canBlockProgress }) => {
if (isCheckbox) {
return {
behavior: 'allow',
}
} else {
return {
behavior: 'block',
reason: '規約に同意してください',
perform: (result) => {
if (result.behavior === "block") {
setError("規約に同意してください");
}
}
}
}
}
);
const handleChange = useCallback(
(newChecked: boolean) => {
setError('')
setCheckbox(newChecked)
},
[isCheckbox],
);
return (
<Checkbox
id="checkbox1"
name="checkboxchoices"
error={isError}
onChange={handleChange}
>
私は価格設定、支払い、配送、返品、責任に関するストアの<Link to="https://www.shopify.com">利用規約</Link>と
<Link to="https://www.shopify.com">プライバシーポリシー</Link>に同意します。
</Checkbox>
);
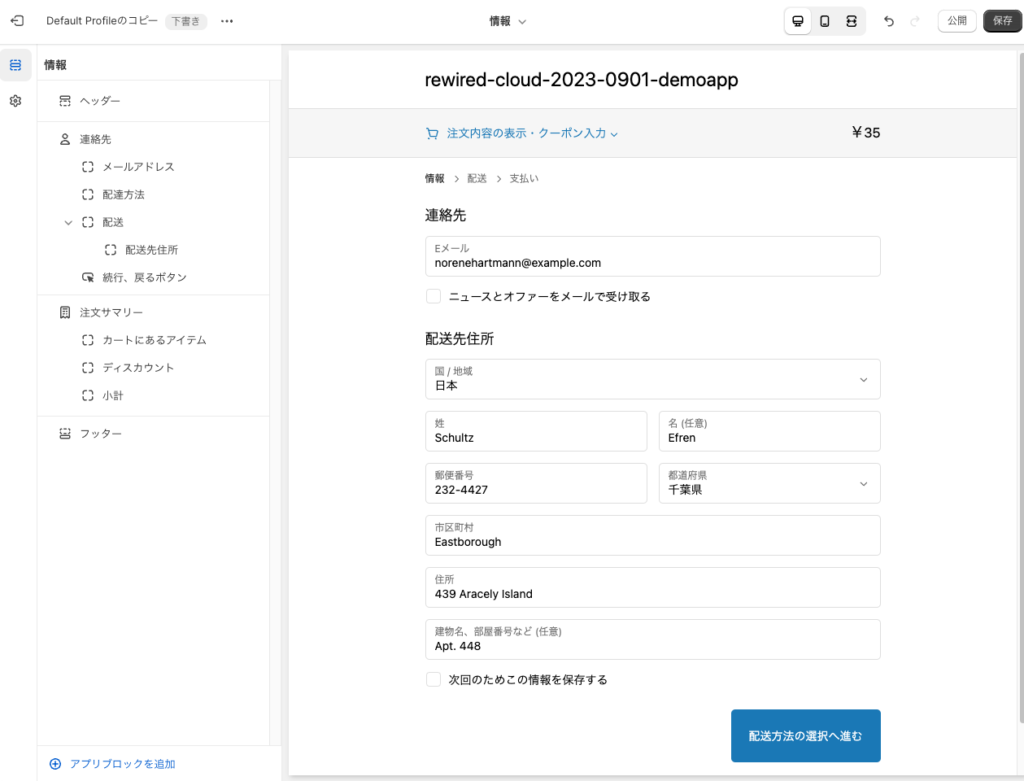
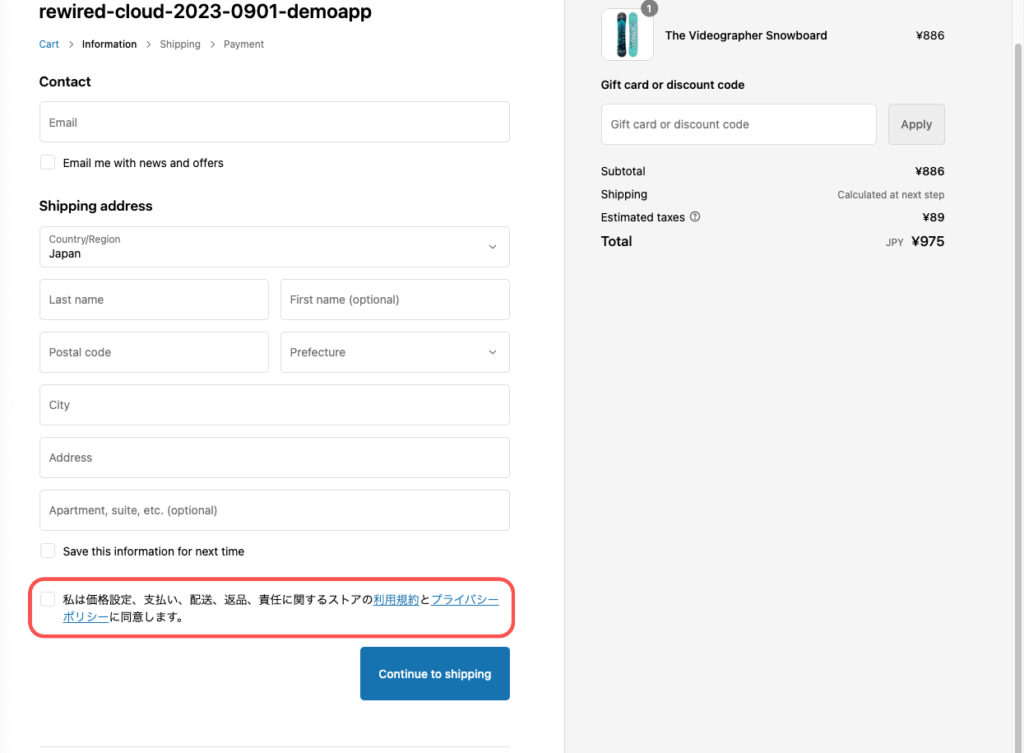
}実装すると以下のように表示されます。
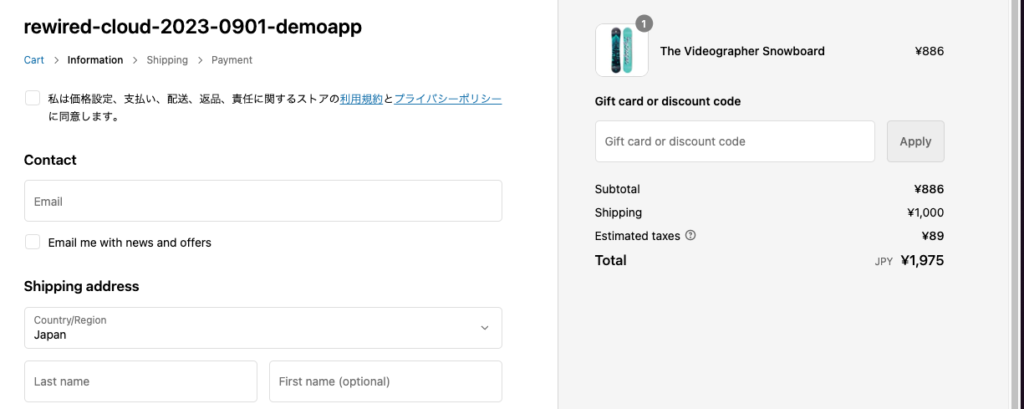
チェックをつけずに進むと、以下のようなエラーが表示され、チェックアウトに進めないことが確認できます。

ここまで進めば、アプリをデプロイします。
以下のコマンドで簡単にデプロイすることが可能です。
npm run deployデプロイするとパートナーダッシュボードのアプリの拡張機能画面に拡張機能が追加されていることが分かります。
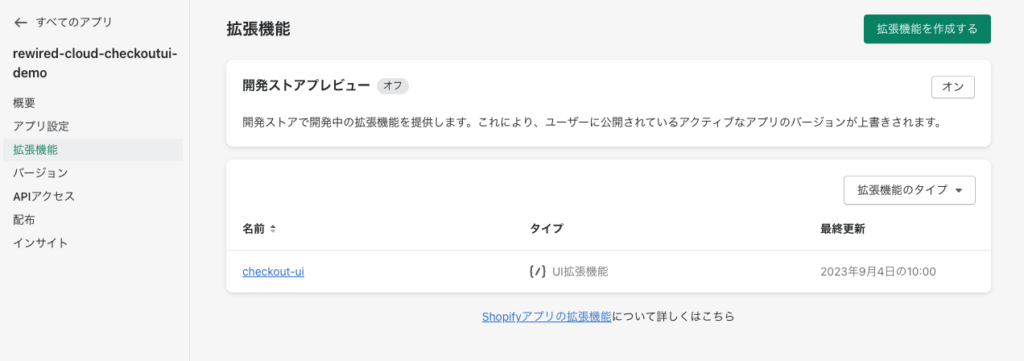
またアプリのバージョン画面でデプロイしたアプリのバージョンがリリースされていることも確認できます。
リリースが確認できたら、作成したCheckout UIを設置するストアに移動して、Shopifyのストアダッシュボードから設定→チェックアウト→チェックアウトのカスタマイズ内のライブチェックアウトに移動してください。
こちらにCheckout UIを設置していきます。
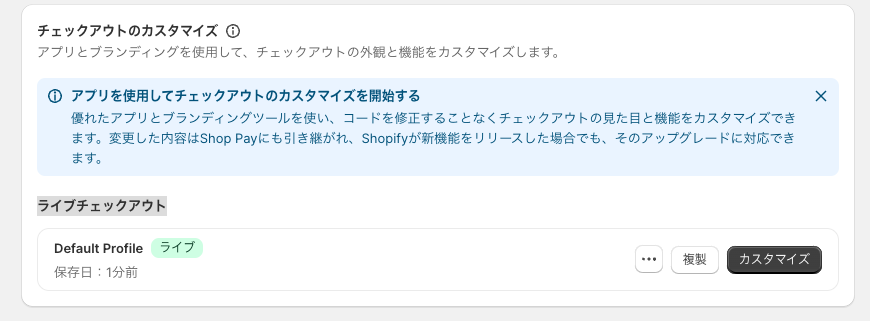
必ず複製をしてから設置作業を行なっていきましょう。
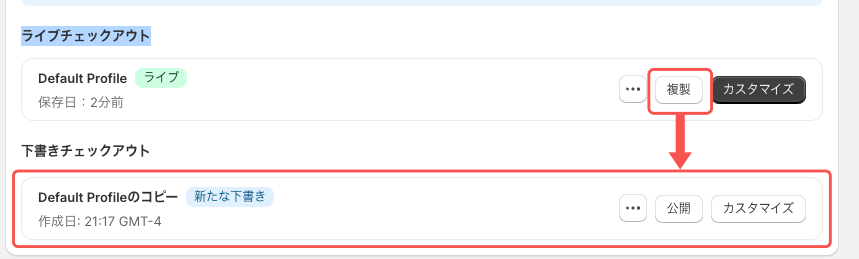
複製すると、「下書きチェックアウト」という画面がでてきますので、こちらのカスタマイズから編集していきます。
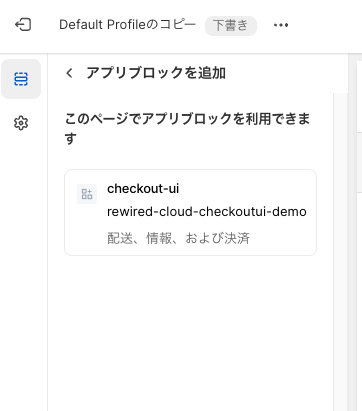
サイドバー最下部の「アプリブロックを追加」をクリックします。すると、先ほど作成した拡張機能が表示されます。
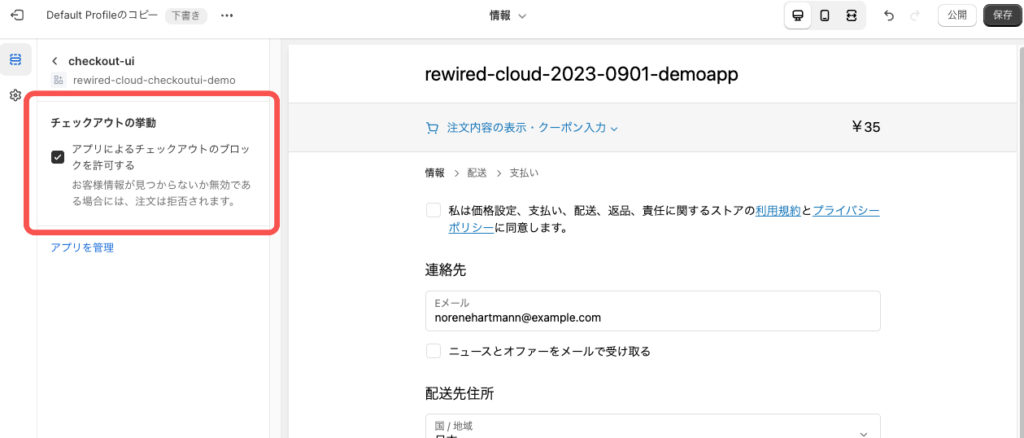
こちらを選択すると「チェックアウトの挙動」という項目が出てきます。この画面は拡張機能で設定できる項目です。今回は、こちらにチェックをつけてください。
Checkout UIを表示させたい項目は、ドラックアンドドロップで変更可能です。設置したい場所へ移動します。
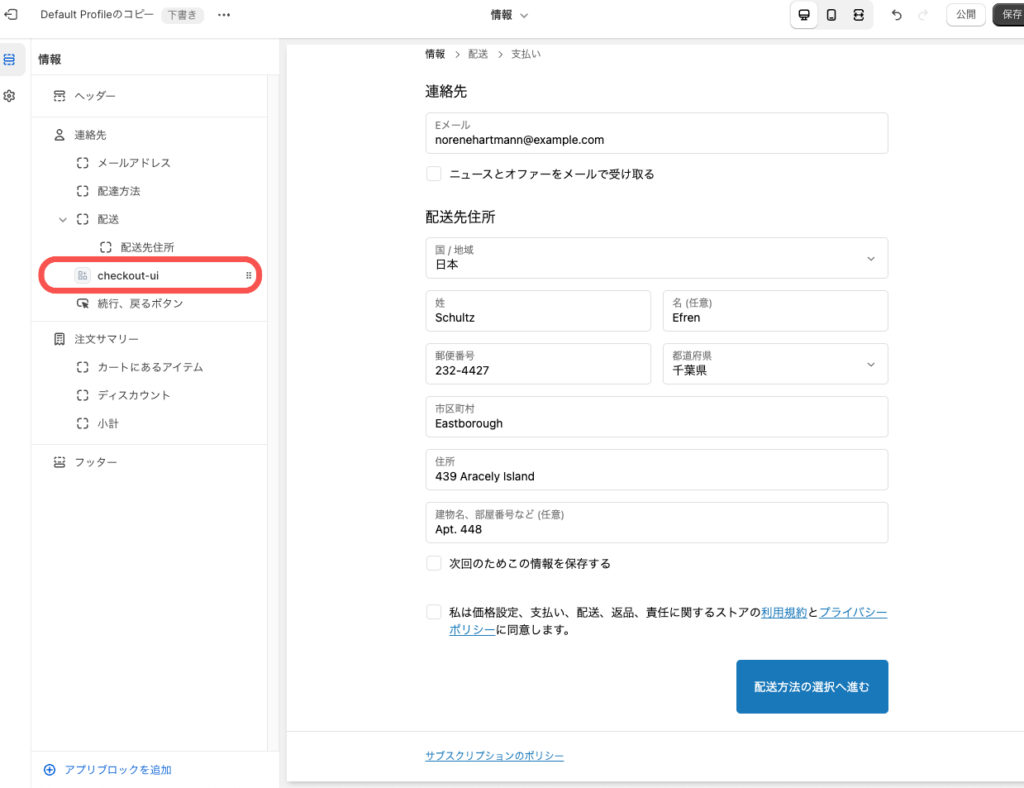
設定が済んだら保存の後、「下書きチェックアウト」をプレビューして動作確認できたら公開しましょう。
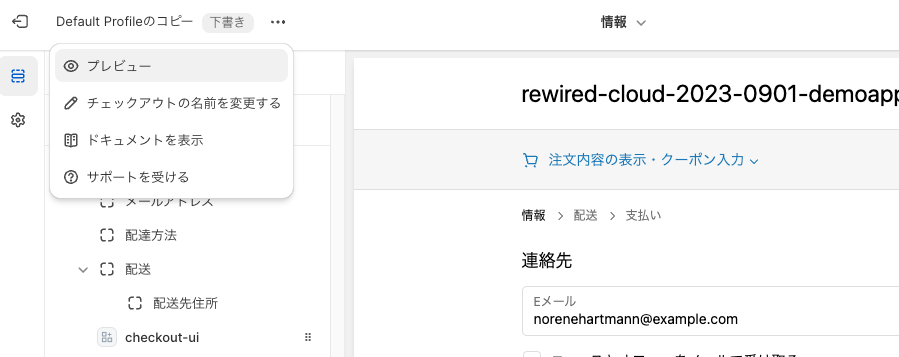
公開すると、下図のように本番でも確認することができますね。
まとめ
実装お疲れ様でした!今回ご紹介したのはCheckout UIのほんの一部でしたが、いかがでしたでしょうか?
Checkout UI extensionsは現在、Shopify Plusでのみ利用可能ですが、購入体験に必要なチェックアウトの拡張ができる唯一の手段です。
自社のサービスの顧客体験向上にぜひ役立ててもらえると幸いです。